With the addition of a second Woodworking in America conference by Popular Woodworking, and the announcement of the new Fine Woodworking Live event the choices for attending a great woodworking conference are many. Maybe too many!
One of the great things about WIA in 2010 and 2011 was the chance to connect with woodworkers you already knew, but hadn't met before. Here is a picture of the guys from 2011. We all showed up in the same shirt - how embarrassing.
Want to let your buddies know where they will see you? Want to avoid the embarrassment and potential drunken debauchery of attending the same event? Let's compare notes.
The 2012 Woodworking Conference Buddy Tracker is now online! Click on over there!
Friday, April 06, 2012
Thursday, March 29, 2012
Fantastic or not?
Tonight I had some time in the shop and tried a little letter carving. You be the judge. Fantastic or not?
One down, several more to go. Just takes a steady hand and some sharp chisels.

One down, several more to go. Just takes a steady hand and some sharp chisels.

Thanks to Kari Hultman for the inspiration and some great tips on the letter carving technique.
Well, what do you think? Let it all hang out. We're in the trust tree.
Tuesday, March 06, 2012
Woodworking Doodles
This is what happpens when a woodworker is stuck on a boring conference call. I've had leg vises on my mind lately.
 |
| Exploded leg vise |
In case you were wondering, SketchUp is just an enabler for my natural tendencies.
Labels:
Data geekery,
design,
Fixtures,
nutty modeling,
OCD,
plans,
Vise,
workbench
Thursday, February 09, 2012
Get Woodworking...Again
It's "Get Woodworking Week", the brainchild of Tom Iovino over at Tom's Workbench which is one of the most consistently updated woodworking blogs on the internet. Tom came up with the idea at the Woodworking in America conference in 2011, and bloggers from around the country have responded to the challenge of getting folks interested in woodworking. Tom is herding the cats and providing links over on his site, so be sure to check out all the great content being posted this week.
Once again I've been away from this blog and the workshop for too long. With a new baby in the house, shop time has been very scarce. I was able to get into the shop a few weeks ago and it was such a big deal that I took a picture of my newest project. Behold, a stick that I made. Out of walnut, of course.
Even this very quick session got me excited again, and I've been trying to get into the shop every day even if it's just for a few minutes. During my day job, I don’t get any opportunity to get “hands on”. Like many other woodworkers, I spend my day clicking and typing at my PC. I find that some time in the shop is very therapeutic and gives me something to look forward to. Frankly, I like to use my hands and I just get a little antsy if it’s been too long since I picked up a tool. You can bet that I'll keep it up now that I'm back in the shop.
I could get all philosophical about the value of work and the connection between physical labor and societal value in the modern world, but I am never able to find the words and others do it much better than me. If you are interested in this sort of thing, try reading Matthew Crawford’s book Shop Class as Soulcraft or Christopher Schwarz’s recent instant classic The Anarchist’s Tool Chest.
Back to woodworking, you might be thinking to yourself “I don’t know how.” Hey, me either. Nobody taught me this stuff when I was a kid, and quite frankly I’m still not a very experienced woodworker. As far as I’m concerned, I’m still a beginner. I’ve cut dovetails exactly once, and I had someone talking me through it the whole time. But woodworking isn’t some mysterious black art that can only be learned in secret back rooms under hardware stores. All you need is some curiosity and the willingness to make a few mistakes along the way.
You won't be alone, trust me. Somehow you found this blog post, so you’ve already discovered that there is a very active online woodworking community. I’ve had the good fortune to meet many woodworkers online and in person over the past few years. It may sound corny, but I know that every single one of them would be willing to answer a question from a new woodworker. Many would even show up in person and help out if they were close enough. If you don’t have a woodworking mentor in your offline life, try visiting a forum or comment on a few blogs and test the waters. My “home” forum is www.woodtalkonline.com and I’ve found it to be very welcoming to newcomers, and all ranges of experience. Another new resource is the Modern Woodworkers Association which has local chapters springing up across the country. The Atlanta chapter meets once a month, so come and say howdy.
You don't need a bunch of fancy tools to get started either. A pretty simple kit will get you a long way down the road to woodworking. In fact, I'd recommend that you should wait to buy tools only as you need them. Many of the "must have" tools that I bought early on are now collecting dust in the shop...Um, but not in the way that a dust collector would collect dust, you know? Because it's a dust collector? Anyway, I now buy tools only as I need them. Except for that chisel Chris Adkins talked me into in November.
So if you've ever thought about giving woodworking a try, this is the week for you. Get Woodworking!
Once again I've been away from this blog and the workshop for too long. With a new baby in the house, shop time has been very scarce. I was able to get into the shop a few weeks ago and it was such a big deal that I took a picture of my newest project. Behold, a stick that I made. Out of walnut, of course.
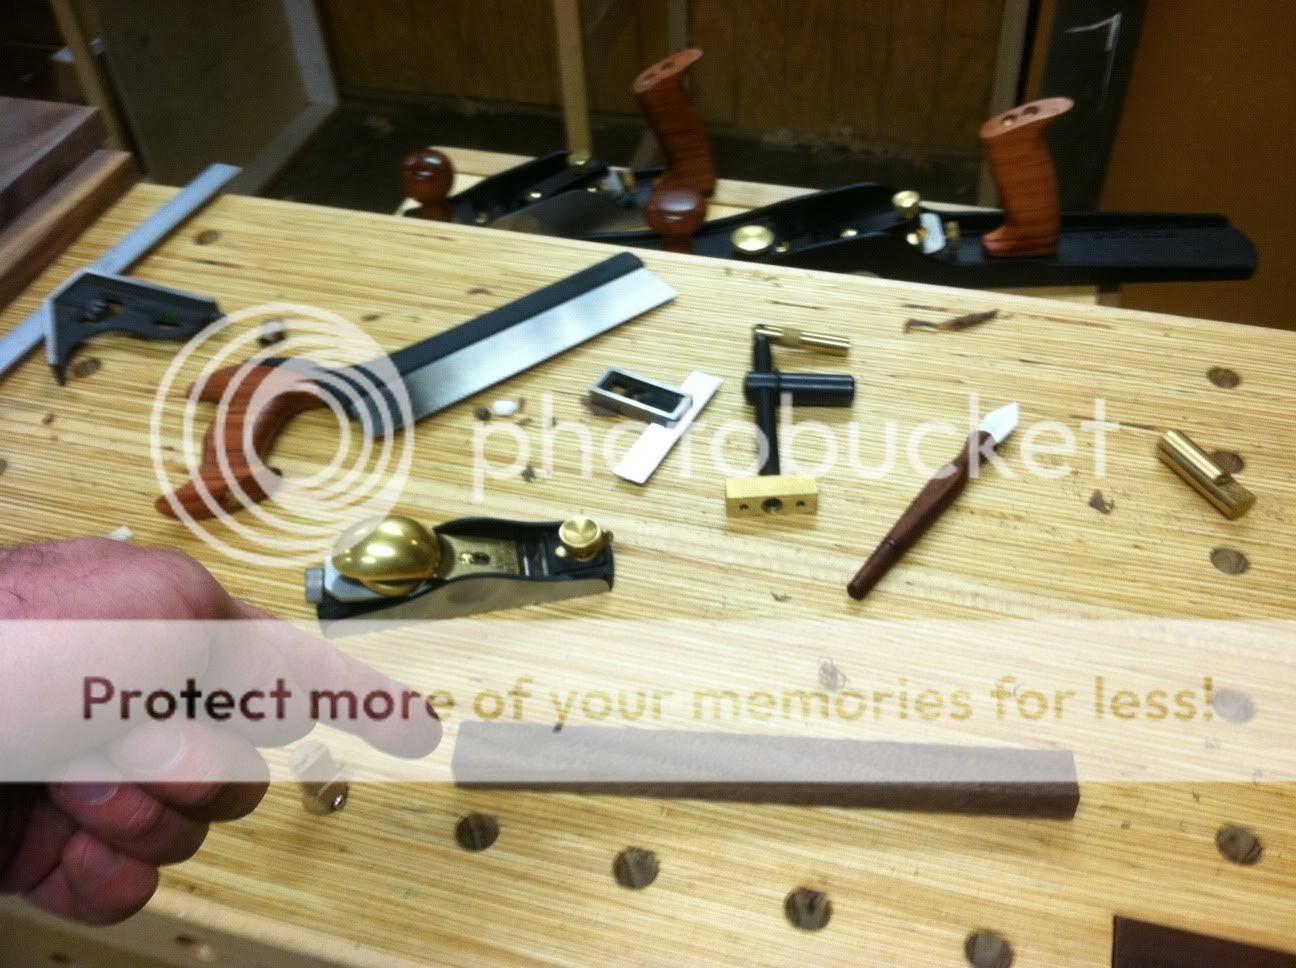 |
| Only took me an hour to make that stick. Felt good! |
I could get all philosophical about the value of work and the connection between physical labor and societal value in the modern world, but I am never able to find the words and others do it much better than me. If you are interested in this sort of thing, try reading Matthew Crawford’s book Shop Class as Soulcraft or Christopher Schwarz’s recent instant classic The Anarchist’s Tool Chest.
Back to woodworking, you might be thinking to yourself “I don’t know how.” Hey, me either. Nobody taught me this stuff when I was a kid, and quite frankly I’m still not a very experienced woodworker. As far as I’m concerned, I’m still a beginner. I’ve cut dovetails exactly once, and I had someone talking me through it the whole time. But woodworking isn’t some mysterious black art that can only be learned in secret back rooms under hardware stores. All you need is some curiosity and the willingness to make a few mistakes along the way.
You won't be alone, trust me. Somehow you found this blog post, so you’ve already discovered that there is a very active online woodworking community. I’ve had the good fortune to meet many woodworkers online and in person over the past few years. It may sound corny, but I know that every single one of them would be willing to answer a question from a new woodworker. Many would even show up in person and help out if they were close enough. If you don’t have a woodworking mentor in your offline life, try visiting a forum or comment on a few blogs and test the waters. My “home” forum is www.woodtalkonline.com and I’ve found it to be very welcoming to newcomers, and all ranges of experience. Another new resource is the Modern Woodworkers Association which has local chapters springing up across the country. The Atlanta chapter meets once a month, so come and say howdy.
You don't need a bunch of fancy tools to get started either. A pretty simple kit will get you a long way down the road to woodworking. In fact, I'd recommend that you should wait to buy tools only as you need them. Many of the "must have" tools that I bought early on are now collecting dust in the shop...Um, but not in the way that a dust collector would collect dust, you know? Because it's a dust collector? Anyway, I now buy tools only as I need them. Except for that chisel Chris Adkins talked me into in November.
So if you've ever thought about giving woodworking a try, this is the week for you. Get Woodworking!
Thursday, October 13, 2011
The Heavy-Duty Hideaway Bench
Woot! I'm famous, or at least my bench is. I was pleased as punch to be featured over on The Wood Whisperer Guild site. Marc and the Guild are gearing up to build a Split-Top Roubo workbench, and he is doing some interviews with some Guildees about their current benches.
If you have come looking for more details on the "Heavy-Duty Hideaway Bench" just look for posts tagged "workbench" or click this link.
Thanks for stopping by! Glad you're here!
If you have any questions about the bench like "What the heck were you thinking?!?! then just post a comment. I'd be happy to reply.
Monday, September 12, 2011
Moxon Vise with Metal Screws
Workbenches and vises have been very popular topics for magazines, bloggers, and manufacturers for the past few years. Thanks to Chris Schwarz and others, we have all been able to dive deeply into workholding theory for the shop. Building a capable workbench is becoming a rite of passage for modern woodworkers.
It doesn't look like this resurgence will slow any time soon. In fact, there are a couple great workbench builds going on right now across the web. For instance, check out Kari Hultman's blog, The Village Carpenter as she begins construction of a Roubo style bench. In addition, Marc Spagnuolo has announced that the winter build for The Wood Whisperer Guild will be a Benchcrafted Split-Top Roubo Workbench.
One design that has gotten a lot of recent attention is the Moxon Vise, which is a handy clamping accessory for working on the ends of boards. It excels at holding boards for dovetailing or tenoning with a hand saw. Based on a 17th century manuscript by Moxon, the common design spreading through the woodworking world comes from a recent article in Popular Woodworking Magazine by Schwarz. That guy is everywhere! The Moxon is a twin-screw vise that clamps on top of your workbench, so it raises the work up to a better height for sawing.
One downside to the Schwarz design is that it uses shop-made wooden screws, so you will need a threading and tapping kit. This is about a $50 pain in the butt, and I've heard that the tapping kits are very finicky and tough to get working correctly. On top of that, wooden screws will expand and contract with seasonal humidity changes so they may not always work smoothly.
After a little googling, I was able to find a cheap source for some 1" metal rod with Acme threads. Using metal screws avoids the problem of working with a threading kit, and another bonus is that the metal screws are 4 tpi (threads per inch). The wooden threading kits I found were 6 tpi, so the metal screws should screw in and out 33% faster!
I got the stuff from surpluscenter.com and the part numbers you need are 1-2983-100-3 for the threaded rod and 1-2984-100N for the nuts. I tried to find some surplus Acme rockets like Wile E. Coyote used, but no luck there. Total cost for 3ft of threaded rod and four nuts was about $60 plus shipping. This is enough for two Moxon vises, so the cost is about the same as a threading kit.
The first task was to cut up the threaded rod into smaller pieces. I needed 7" lengths of thread for my design, which yields a 2 1/2" capacity in the vise. If you want to hold thicker boards, you may need longer screws.
My neighbor is a wood turner and he was kind enough to turn a couple walnut handles for me. Did I mention how much walnut we have? The plan was to epoxy the threaded rod into the handles, and it worked like a smelly, sticky charm.
Next, I needed to make the vise body and front chop. I used a seasoned 2x10 that was laying around the shop (well, my neighbor's shop...but he looked the other way for a couple seconds too long!) I stayed pretty close to the dimensions from Schwarz's magazine plans. With luck and planning you will end up with a little more than 24" between the screws.
It doesn't look like this resurgence will slow any time soon. In fact, there are a couple great workbench builds going on right now across the web. For instance, check out Kari Hultman's blog, The Village Carpenter as she begins construction of a Roubo style bench. In addition, Marc Spagnuolo has announced that the winter build for The Wood Whisperer Guild will be a Benchcrafted Split-Top Roubo Workbench.
One design that has gotten a lot of recent attention is the Moxon Vise, which is a handy clamping accessory for working on the ends of boards. It excels at holding boards for dovetailing or tenoning with a hand saw. Based on a 17th century manuscript by Moxon, the common design spreading through the woodworking world comes from a recent article in Popular Woodworking Magazine by Schwarz. That guy is everywhere! The Moxon is a twin-screw vise that clamps on top of your workbench, so it raises the work up to a better height for sawing.
 |
| Schwarz's version of the Moxon vise |
After a little googling, I was able to find a cheap source for some 1" metal rod with Acme threads. Using metal screws avoids the problem of working with a threading kit, and another bonus is that the metal screws are 4 tpi (threads per inch). The wooden threading kits I found were 6 tpi, so the metal screws should screw in and out 33% faster!
I got the stuff from surpluscenter.com and the part numbers you need are 1-2983-100-3 for the threaded rod and 1-2984-100N for the nuts. I tried to find some surplus Acme rockets like Wile E. Coyote used, but no luck there. Total cost for 3ft of threaded rod and four nuts was about $60 plus shipping. This is enough for two Moxon vises, so the cost is about the same as a threading kit.
 |
| This is all the hardware you'll need for a couple Moxon vises |
The first task was to cut up the threaded rod into smaller pieces. I needed 7" lengths of thread for my design, which yields a 2 1/2" capacity in the vise. If you want to hold thicker boards, you may need longer screws.
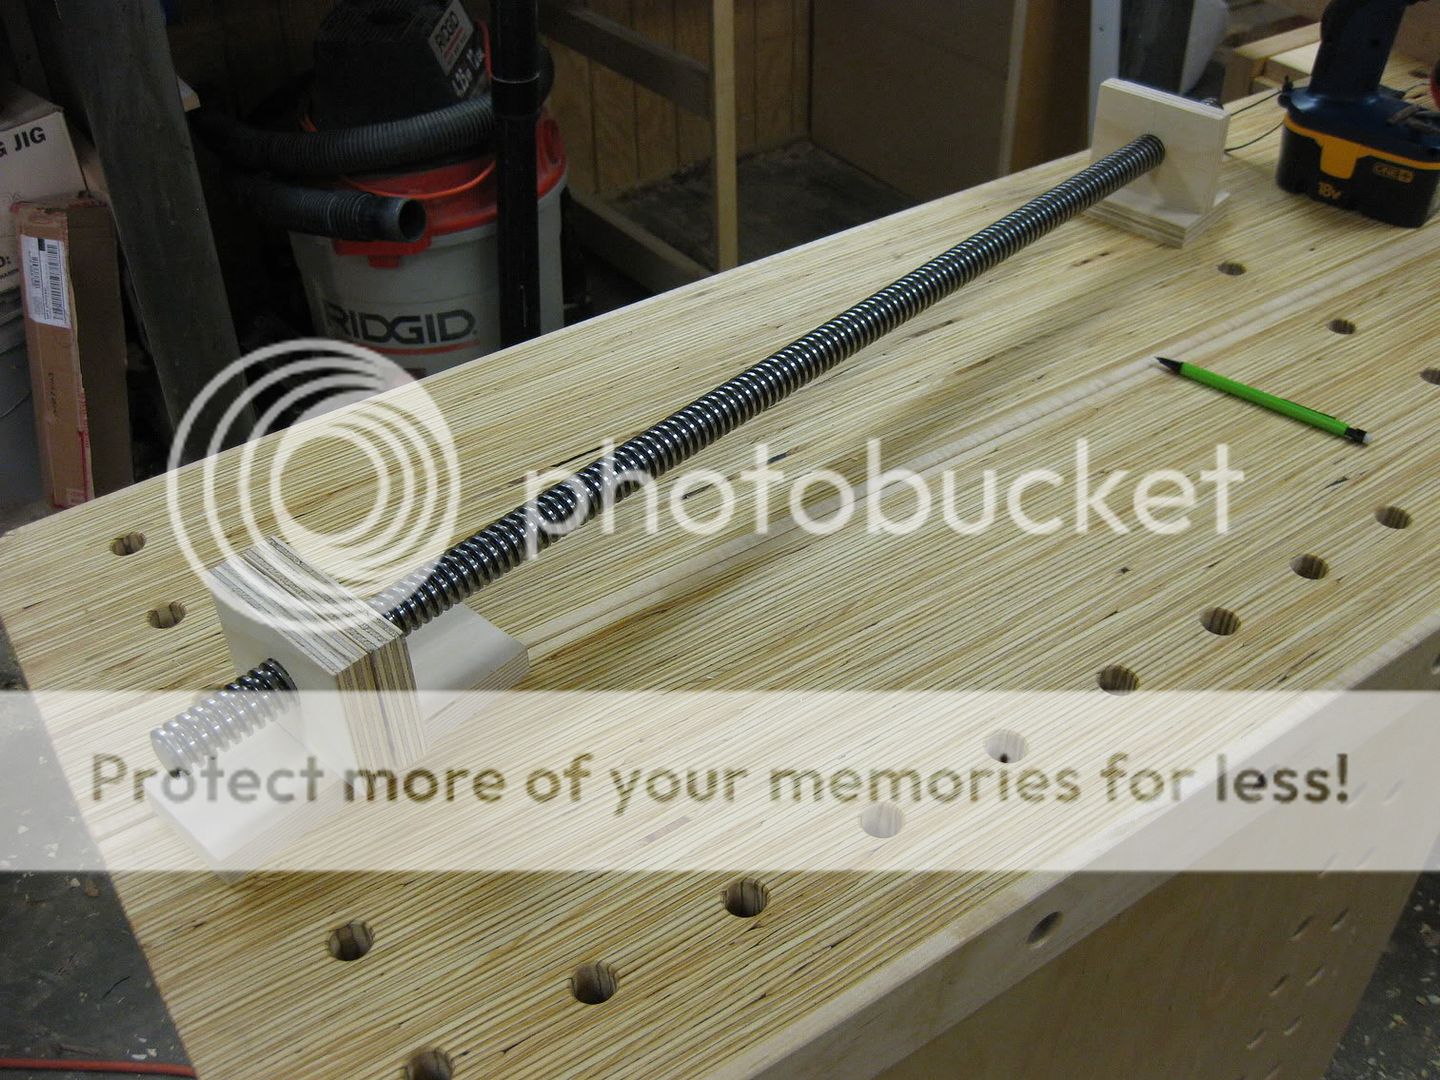 |
| I rigged up these little stands to make cutting the threaded rod easier |
 |
| I wanted to cut 7" sections of the rod for my purposes |
 |
| You could go crazy with a hacksaw, but I used a sawzall to make the cuts. Slip the blade into the slot in the stand to keep the cuts as straight as possible. |
 |
| Flip the stand on its side and use a metal vise to clean up the cut. Get it close to 90 degrees, and remove all sharp edges that can injure you. |
My neighbor is a wood turner and he was kind enough to turn a couple walnut handles for me. Did I mention how much walnut we have? The plan was to epoxy the threaded rod into the handles, and it worked like a smelly, sticky charm.
 |
| One of the walnut handles my neighbor made, a section of threaded rod, and 5-minute epoxy. What could go wrong? |
 |
| Put the epoxy into the hole, and work the threaded rod down into the epoxy so that the threads get filled up. |
Next, I needed to make the vise body and front chop. I used a seasoned 2x10 that was laying around the shop (well, my neighbor's shop...but he looked the other way for a couple seconds too long!) I stayed pretty close to the dimensions from Schwarz's magazine plans. With luck and planning you will end up with a little more than 24" between the screws.
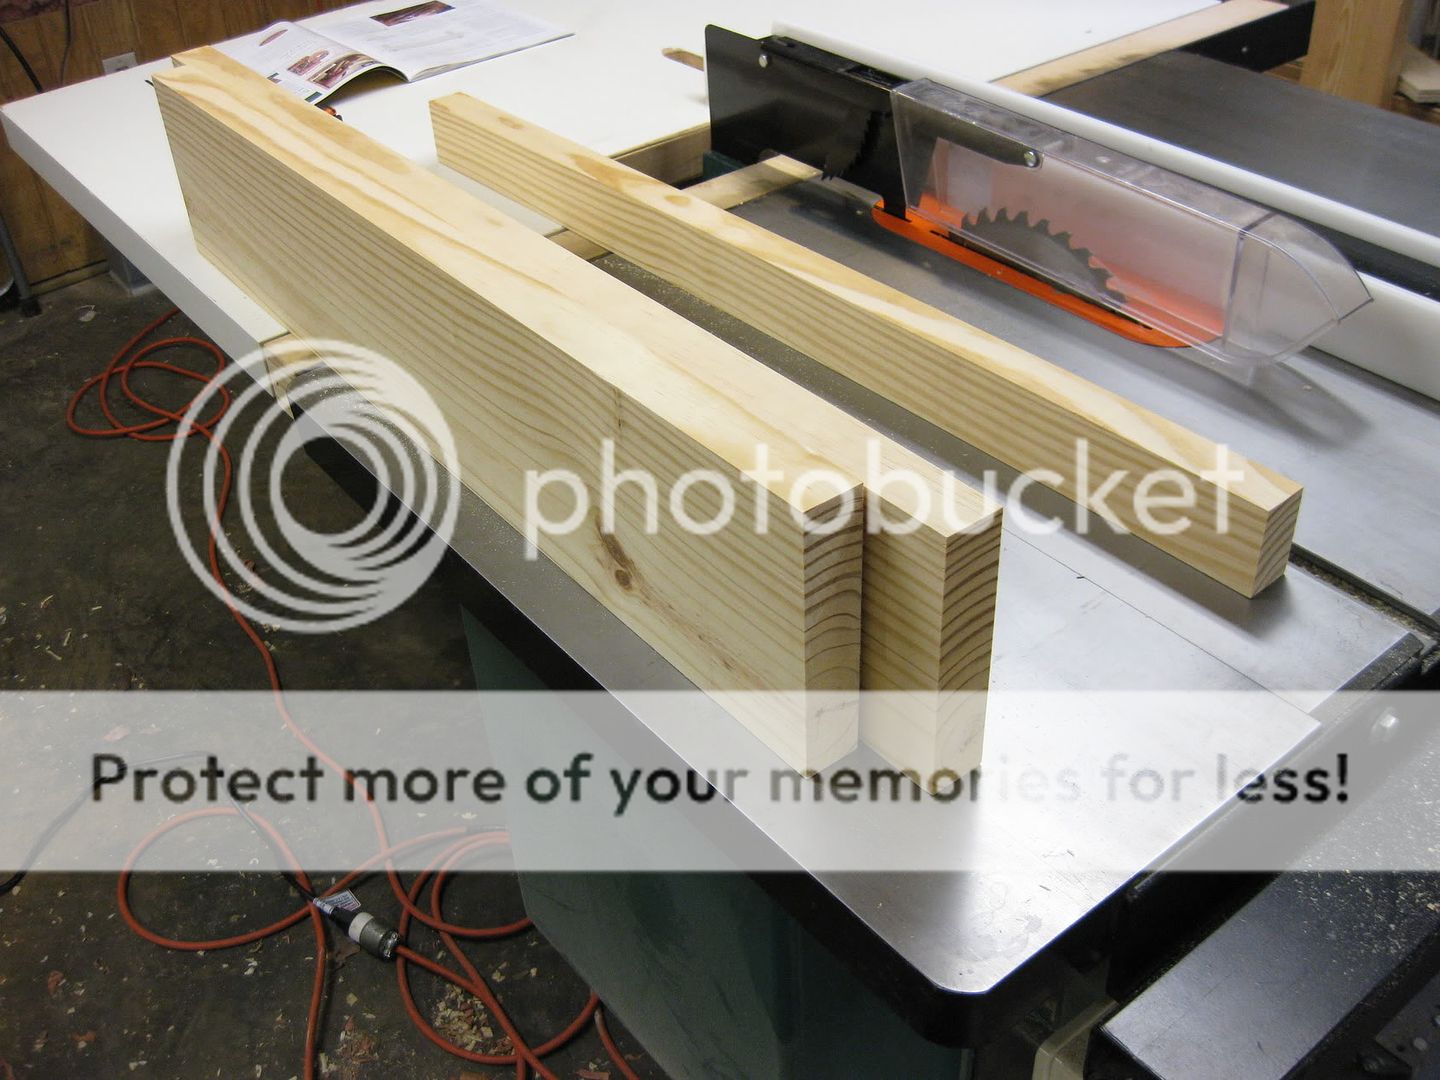 |
| Front vise chop, rear body, and stabilizing support were cut and milled square. |
The screws go through the front chop, and thread into the rear body of the vise. For the wooden-screw versions, you would need to use a tapping kit to cut some threads in the holes in the main body. I simply drilled some 1" holes and sunk the nuts into the back of the body so they wouldn't spin.
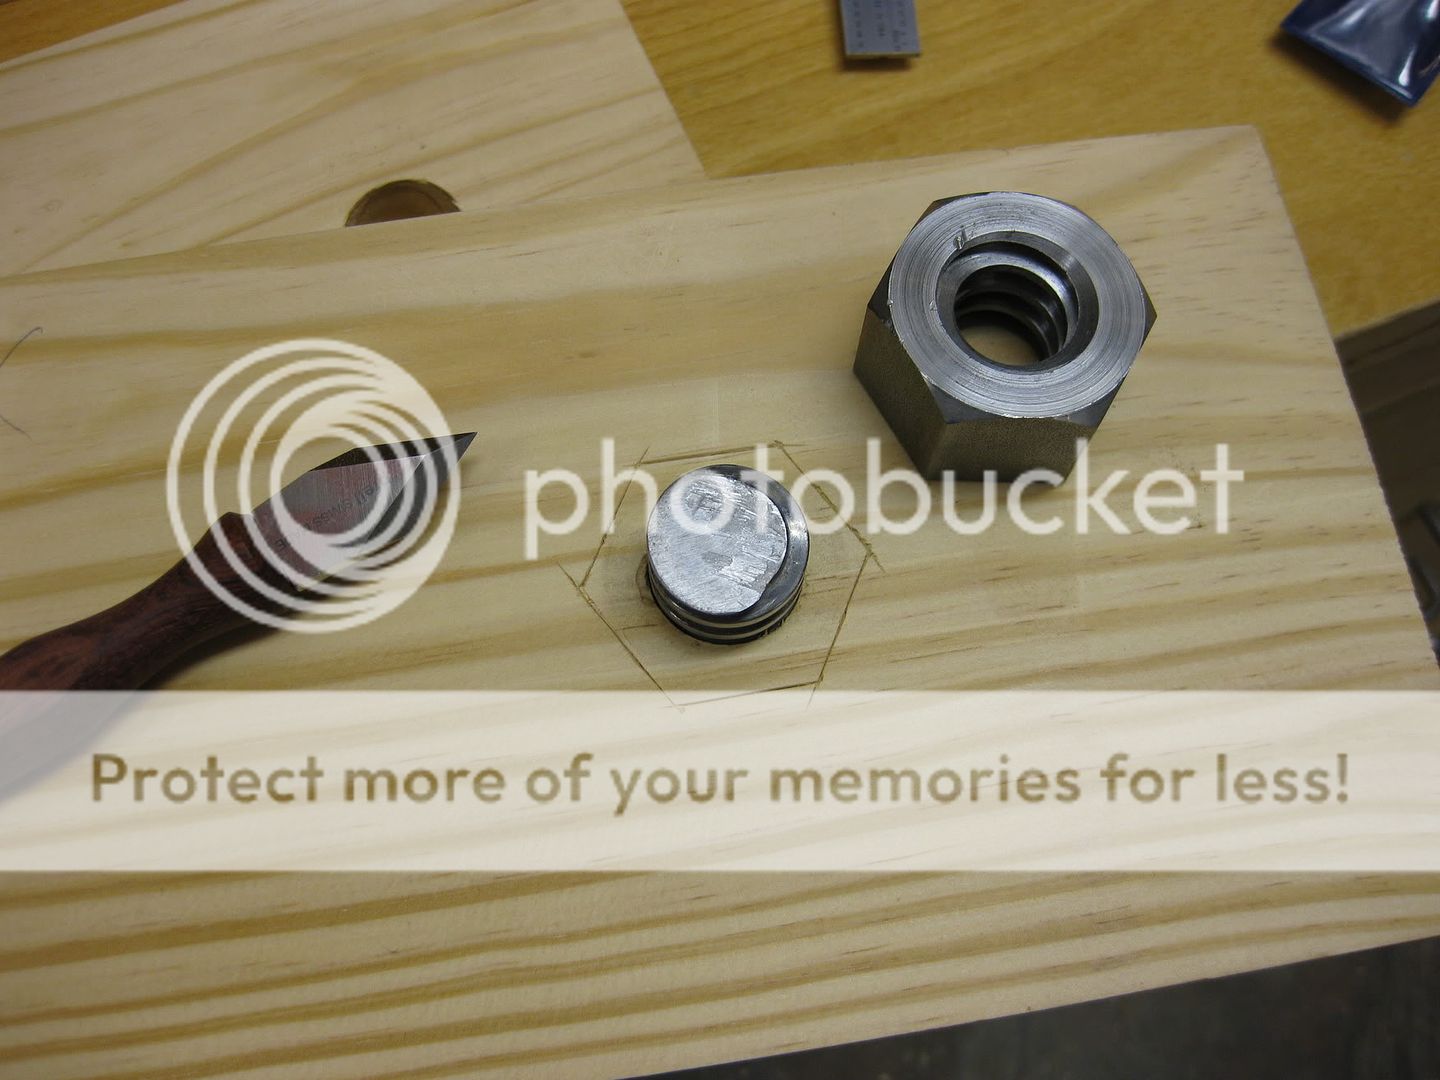 |
| I used a knife to mark the locations of the nuts on the back of the vise. |
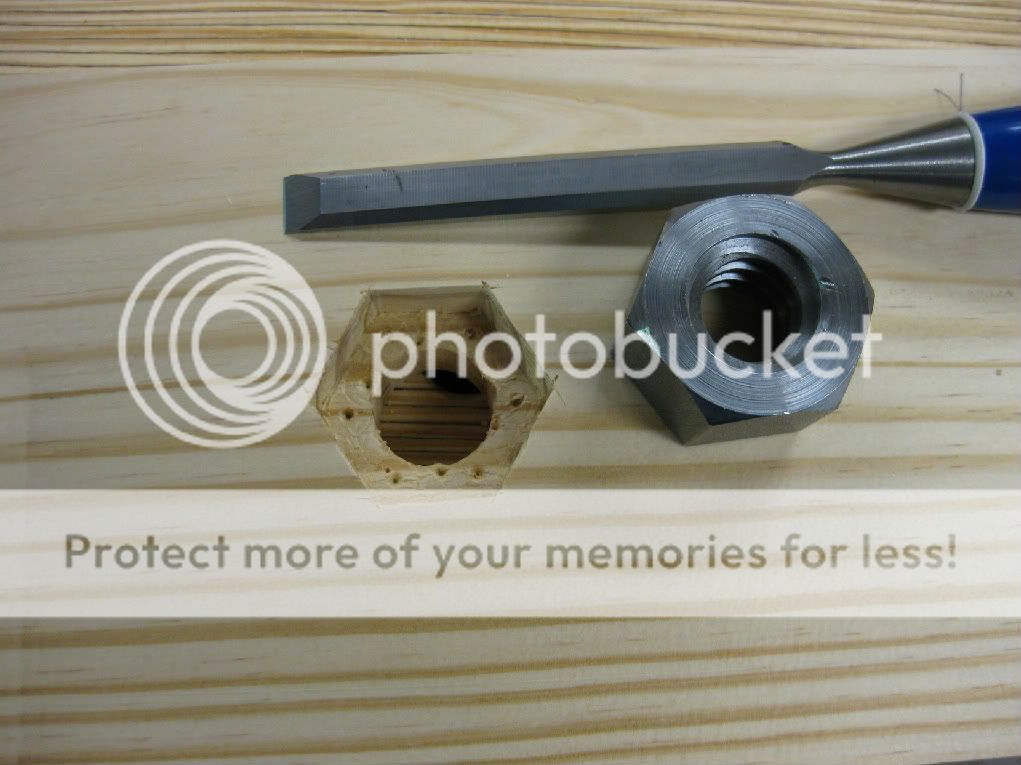 |
| A little drilling and chiseling created a recess for the nut to sit in. |
 |
| The nuts are just friction fit, though a little epoxy would work fine also. |
Here is the completed Moxon vise, shown from the back. You can see why the nuts are countersunk, so they won't rotate when you tighten the screws.
 |
| All the edges are chamfered, and a little danish oil makes a good finish |
The Moxon vise sits on top of your regular workbench, and you can just clamp it down to the bench top. This provides a rock-solid way to clamp a board for working on the end. It's great for hand sawing, and also raises the workpiece up to a much more comfortable height.
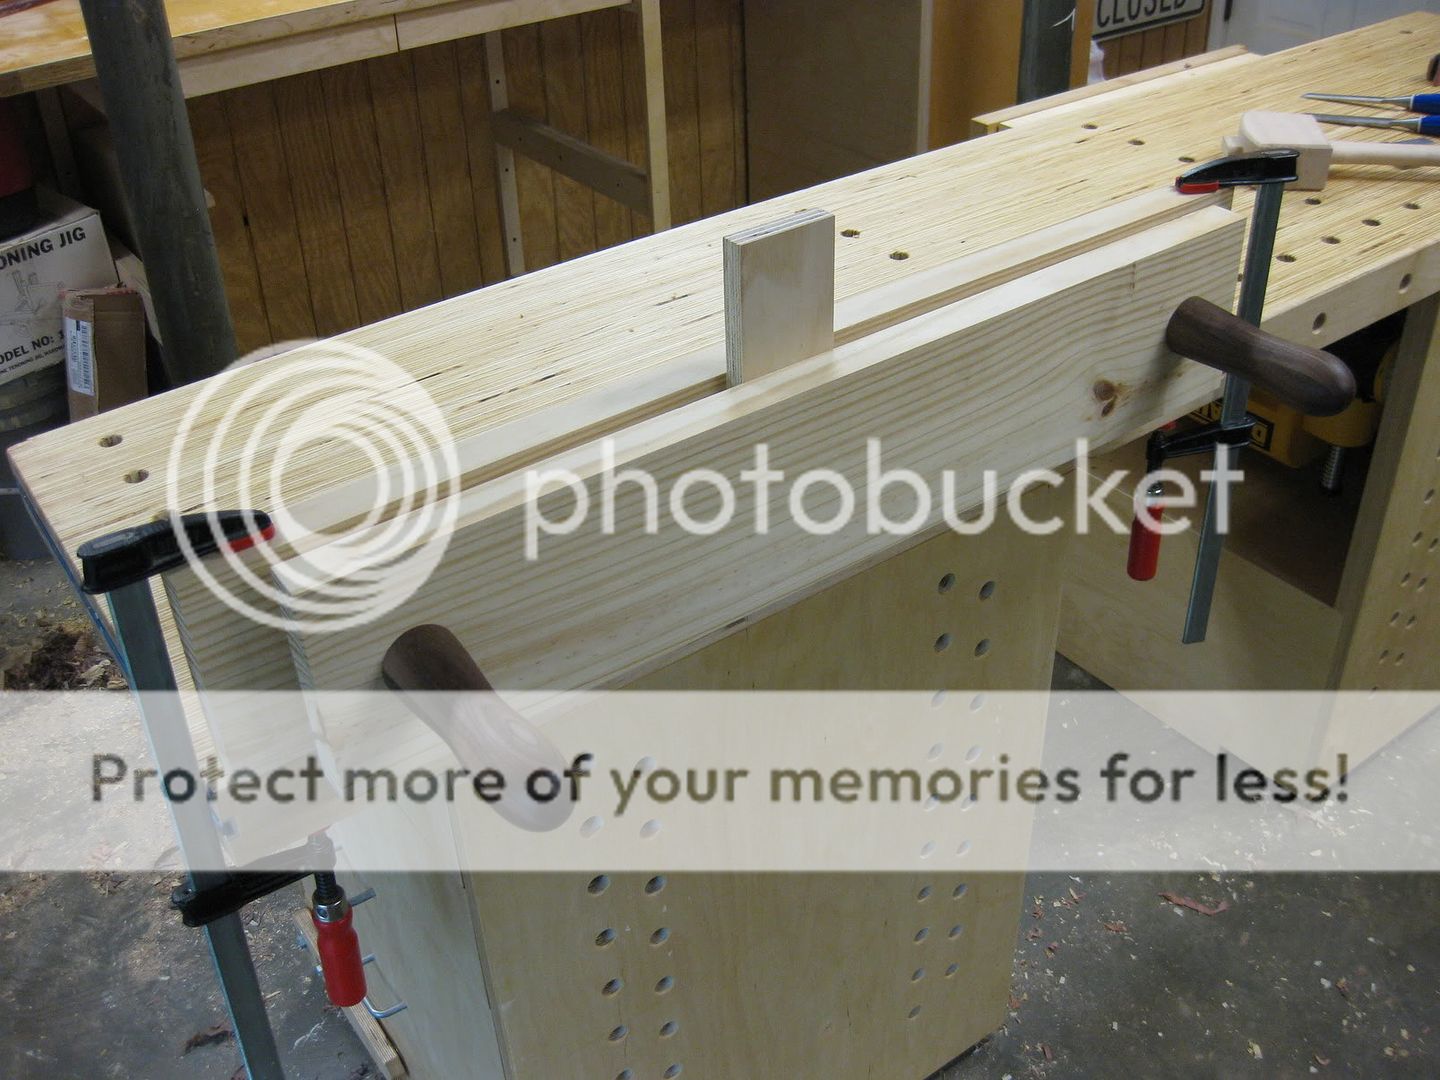 |
| With 24" between the screws, you could dovetail the side of a cabinet in this vise. |
I can see why this vise has become so popular among woodworkers. It's an easy build, and really is specialized for working the ends of boards. Combine this with other vises on your bench, and you will be all set for any hand tool woodworking.
Here is a picture of my wacky English woodturning neighbor giving the vise a test drive. I think he likes it!
 |
| He's having a little too much fun! |
Have you built a Moxon vise? Let's hear about it in the comments!
Labels:
Fixtures,
Hand Tools,
Pop Woodworking,
shop upgrade,
The Schwarz,
The Wood Whisperer,
Tip,
Vise,
workbench
Monday, July 11, 2011
Apologies to Benny Hill
My last post was about a cart I built for my short drill press, and the possibly dangerous creative use of a couple rachet straps to hoist it onto the cart. It had been sitting on the floor for years, and I finally managed to raise it up to a better working height. Of course, I didn't plan ahead so I had to order the wheels.
The wheels came in, and hilarity ensued.
The wheels came in, and hilarity ensued.
Subscribe to:
Posts (Atom)


