I have been hinting lately about the workbench I am building, but not giving many clues about the design. Sorry for being so secretive, but I really wanted to make sure a few things worked out before going public in case these ideas were really foolish. I have found that medium foolishness is fine, but "really" foolish should be avoided.
Like many others out there in the woodworking community I have devoured all the recent books about workbenches, particularly those by Chris Schwarz and the extended Pop Woodworking Staff. It's hard to have a discussion about benches without relying heavily on their material. I scoured the internet for plans, comparing Roubo with Nicholson, Moxon with Holtzappfel, $175 benches with 21st Century benches, and all the rest. I wanted to take all the good features from all of those and blend them together into the bench of my dreams.
Then I did a little reality check, which I will share with you now. There isn't space in my shop for a bench unless I get rid of some large tools. I'll never be a hand tool only woodworker and after all these years of looking strategically mopey before birthdays and anniversaries I sure can't tell my wife I'm getting rid of anything.
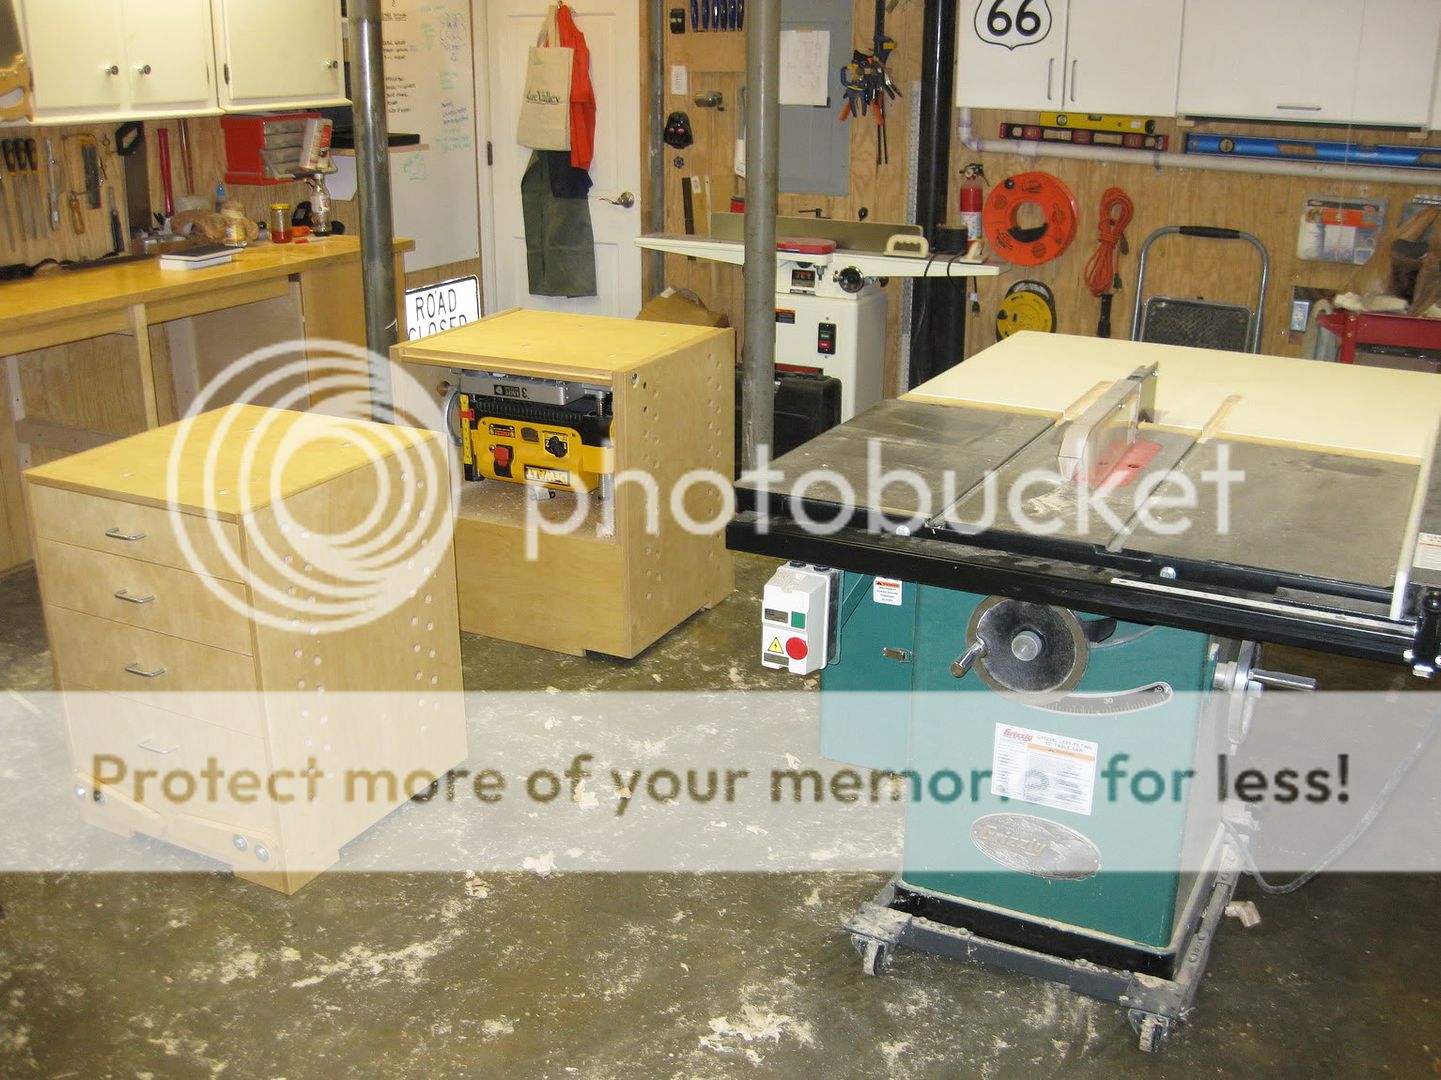
But don't take my word for it - take a look at this panoramic picture of my shop.
Many eagle-eyed viewers will sees something that could be removed to get a ton (or three) more space in the shop. I'll wait while you try to find it. Hint: It has the highest horsepower rating in the shop.
Alright, I should park the Buick elsewhere but life is a compromise. We live in an old house downtown, and the only garage is under the house. The car has to get parked inside, so the first rule of my shop is "everything on wheels". The garage is 19' deep and about 16' wide so at least there is enough space to wheel everything out of the way when the car has to come back in. I've been working on getting everything mobile and I'm about halfway done. I still have plans for a miter saw cart and drill press cart on my to-do list.
As you can see, I also have several steel columns holding up the place. They are perfectly positioned for maximum inconvenience, blocking the long wall where I have a countertop set up. Back to the workbench design, all this is just meant to show that space is an issue for me. I want a full-featured bench but have nowhere to keep it.
I started reading about knockdown workbenches, but this doesn't mean the same to me as it does to most authors. Most knockdown designs are meant to solve the "I might move someday and need to take my bench apart" problem. I literally want to take my bench apart every night.
The last paragraph of Schwarz's newest workbench book inspired me to find a solution, and I hope he won't mind if I quote it here. "What can I remove and still have all the functionality I need? When I cannot remove anything else, it's time to start cutting wood." Vises? Don't need them - they are too heavy to hoist around anyway. Legs? Stretchers? Shelves? Bah, who needs them. After all, a bench is just a 3D clamping surface, right? My design eventually devolved into nothing more than a top sitting on...something. I think it works for me, but maybe others will like the concept too.
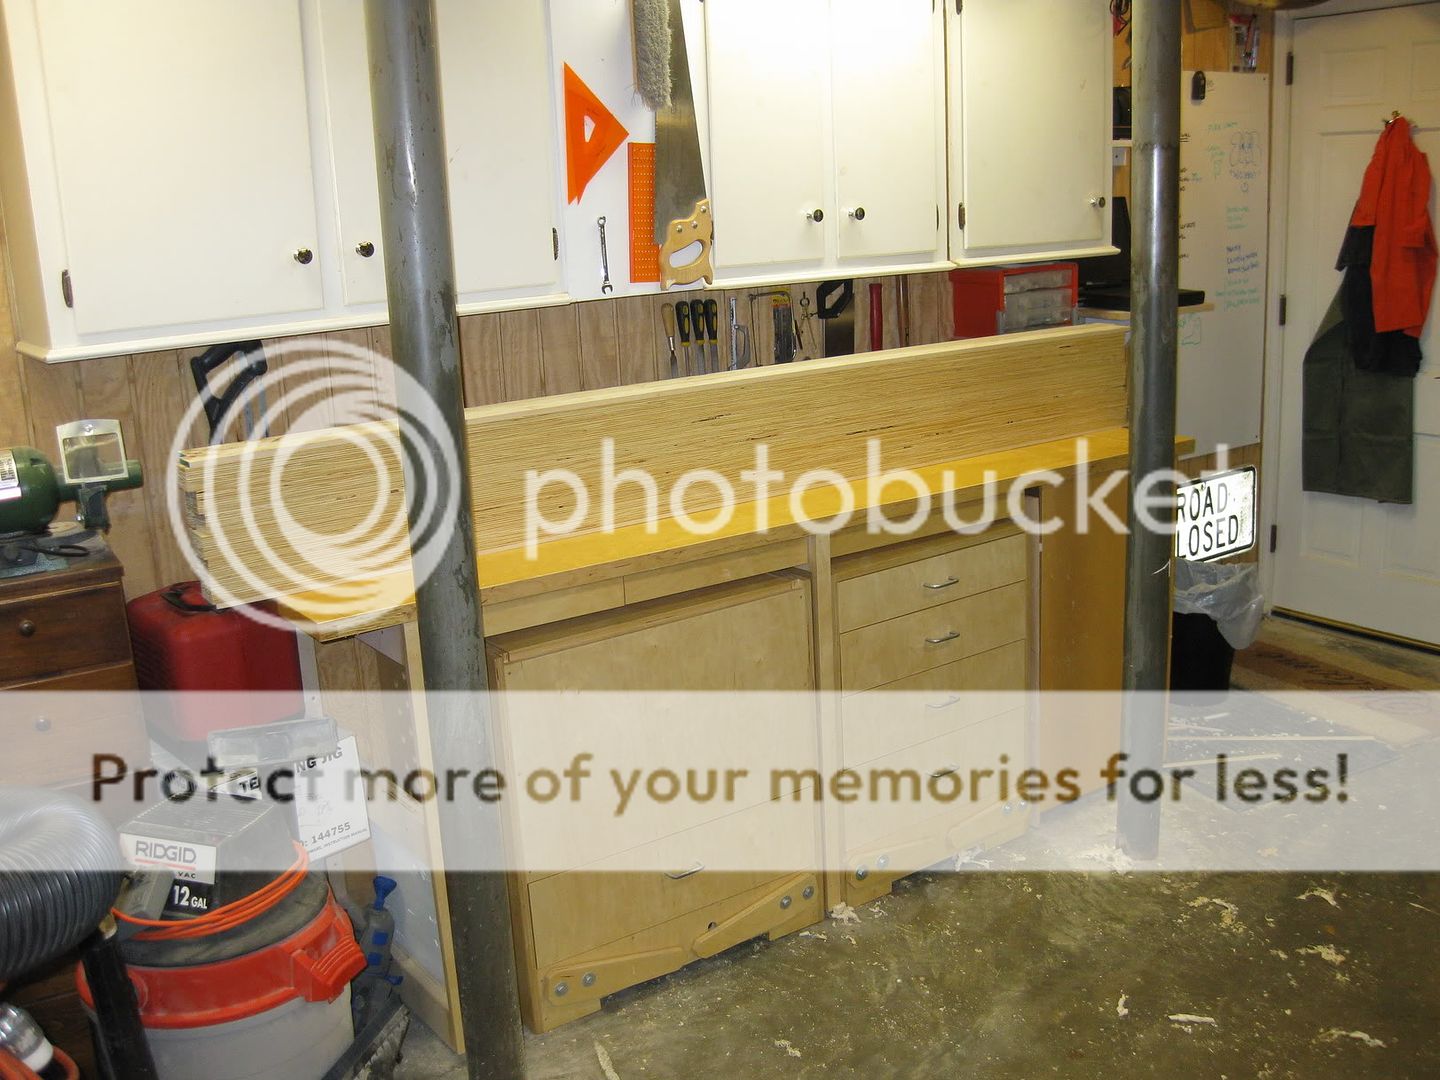
Let's see. Here's a shot of the long wall of the shop, once the car is out and the table saw is rolled away.
In the picture above, there are two mobile carts under that countertop. They both have retractable wheels and can roll out into the shop. The one on the left is a flip-top stand that holds my planer and the other is simply a stack of drawers.
Roll them out, lift the wheels and the two carts make a good base to support the workbench top. The top is made of two separate beams that are 7 feet long and about 10 inches wide. I used LVL for the slabs after seeing the "Gluebo" at Woodworking in America. The extra rigidity of the LVL allowed me to get the top down to about 2 1/2" thick.
When it's time to stop for the evening, I am able to take the two top slabs and stand them in the corner. Then I just roll the cabinets back under the counter and the bench is tucked away for the night. The whole thing takes less than 5 minutes, including moving the table saw back over and driving in the car.
There's a lot more to share about this bench but this post is getting long and I suspect you may be shaking your head. Coming soon, I will go into details about securing the top to the base cabinets, work holding accessories, and vise replacements. Stay tuned for more!
Think I'm a visionary, or just plain nuts? Either way, I'd love hearing what you think about the bench design. See any work holding tasks that may be a problem for me? Shout it out.
Monday, November 22, 2010
Tuesday, November 16, 2010
Workbench Detail: Dog Holes
I am in the camp that prefers round dog holes in a bench top. Square holes require perfect planning and construction to get them in the right place. I'm great at the first (planning) but kind of "meh" at the second. Round holes are easier to add after the top has been glued up, and they work with a lot of aftermarket accessories. With my new bench I will be using a set of Bench Pups and a Wonder Pup, along with some Grammercy holdfasts and some 3/4 pegs for much of the workholding. All of this works just fine with round holes in the bench.
Chamfering the holes is one of the details I latched onto while planning the bench. This makes it easier to get accessories into holes by slightly widening the mouth. It also helps prevent the hole from chipping out when you remove an accessory. The LVL is particularly prone to flaking so this was an important detail.
Here is the before shot of a typical hole, made with a 3/4" forstner bit in a drill press.
And here is a hole after a very slight chamfer was added with a router.
Of course, safety first even if it includes silly pink filters on your dust mask.
Chamfering the holes is one of the details I latched onto while planning the bench. This makes it easier to get accessories into holes by slightly widening the mouth. It also helps prevent the hole from chipping out when you remove an accessory. The LVL is particularly prone to flaking so this was an important detail.
Here is the before shot of a typical hole, made with a 3/4" forstner bit in a drill press.
 |
| Holes in LVL are prone to chip-out |
 |
| Chamfer the hole to make it more durable |
 |
| Pink = Safe |
Sorry to be so stingy with the details on the bench design, but I will be adding more posts about my unique, new, and possibly foolish idea very soon!
Tuesday, November 09, 2010
Blast From the Past - Table Saw Enlarger
Some dilemmas just don't go away, as today's Blast From the Past proves. How many times have we all realized that a tool was just not quite as good as we needed, and tried to improve it?
When I was just getting started in woodworking, my kind wife bought me a small table saw. To my beginner's eyes, this $300 beauty was all the saw I would ever want. I built some great projects with that small saw, and it was good way to dip my toes in the hobby before diving in. Eventually though I came to realize that bigger saws had more to offer than my little direct-drive universal motor saw could provide. I became expert at rattling off the benefits to my wife: the added power of a larger motor, the extra weight of a larger saw to combat vibration, the accuracy of a better fence, the dust collection allowed by an enclosed base, and a larger table surface than my starter saw provided. When a deal popped up, I eventually sold off the saw to a co-worker and upgraded to a Craigslist Grizzly cabinet saw.
In the meantime though, I did try to improve the performance of my starter saw. There are a few good ways to do this. Zero clearance inserts - though the small Delta I had used a weird 1/8" thick plate so I had to make my own. A better blade was a no-brainer, and I became a fan of the Forrest Woodworker II, thin kerf version of course. A blade stabilizer didn't hurt with the thin-kerf blade either. Also, don't overlook the benefits of a good tune up to make sure the saw is aligned properly - miter slot parallel with the blade and fence dialed in just right. I even flattened the arbor washer on a piece of sandpaper to squeeze every last bit of juice out of the saw.
One thing I thought about doing, but never got around to was making a larger enclosure for my small saw to sit in. You may have seen these around the web, and even Norm himself made a version on The New Yankee Workshop. This type of extended table enclosure adds table surface and mass to a small saw, and it could help with dust collection also. Fancy versions may even have a better fence, adding accuracy to the setup.
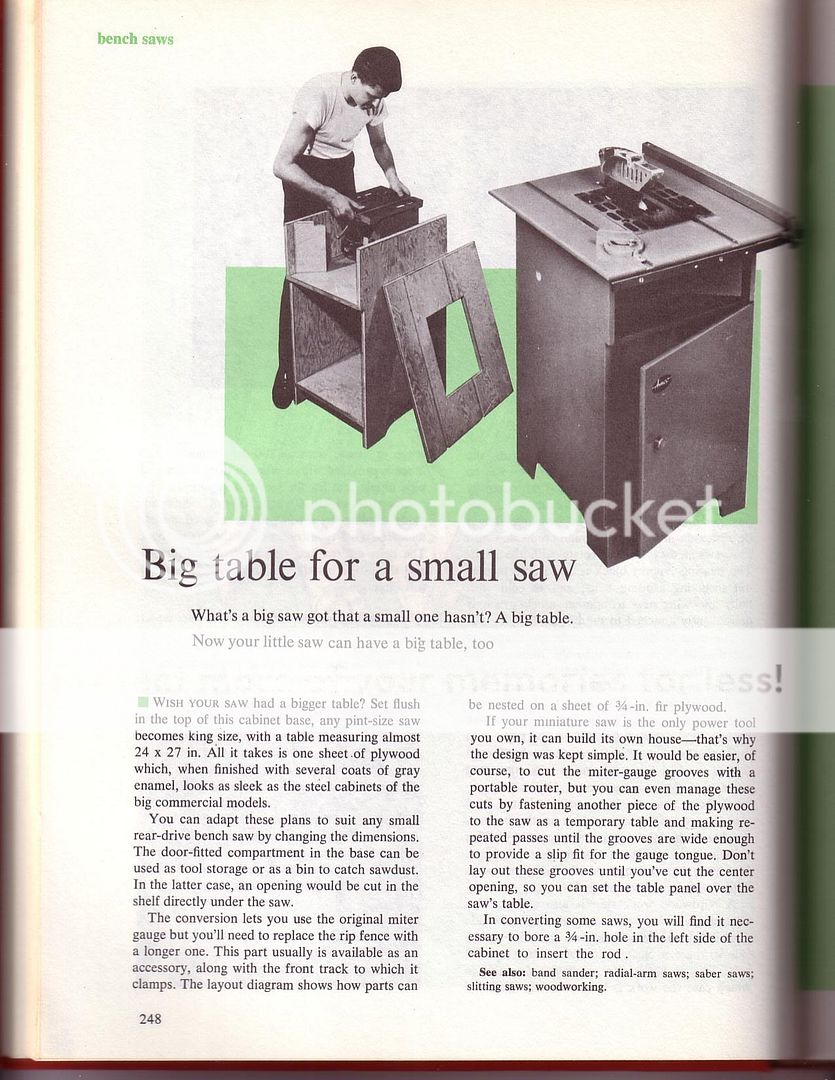
Proving that there aren't many new ideas, here is today's Blast From the Past - click for larger versions of the plans.
This table is designed to accept a very small saw - the opening is just 10"x13". The larger surface of the enclosure is still just 24"x27", which just goes to show that saw sizes have grown over the years. The plan efficiently uses just one sheet of plywood. I would be tempted to make the top a little thicker, but maybe it's thick enough given how small and light that tiny saw must be.
While the exact dimensions in this plan are unlikely to be useful, the idea lives on today. There is hope for small tools, and always a way to improve them. Enjoy!
Did you have a similar experience with upgrading a "starter tool"? Is there a tool you currently have that you want to improve? Let's hear about it in the comments!
When I was just getting started in woodworking, my kind wife bought me a small table saw. To my beginner's eyes, this $300 beauty was all the saw I would ever want. I built some great projects with that small saw, and it was good way to dip my toes in the hobby before diving in. Eventually though I came to realize that bigger saws had more to offer than my little direct-drive universal motor saw could provide. I became expert at rattling off the benefits to my wife: the added power of a larger motor, the extra weight of a larger saw to combat vibration, the accuracy of a better fence, the dust collection allowed by an enclosed base, and a larger table surface than my starter saw provided. When a deal popped up, I eventually sold off the saw to a co-worker and upgraded to a Craigslist Grizzly cabinet saw.
In the meantime though, I did try to improve the performance of my starter saw. There are a few good ways to do this. Zero clearance inserts - though the small Delta I had used a weird 1/8" thick plate so I had to make my own. A better blade was a no-brainer, and I became a fan of the Forrest Woodworker II, thin kerf version of course. A blade stabilizer didn't hurt with the thin-kerf blade either. Also, don't overlook the benefits of a good tune up to make sure the saw is aligned properly - miter slot parallel with the blade and fence dialed in just right. I even flattened the arbor washer on a piece of sandpaper to squeeze every last bit of juice out of the saw.
One thing I thought about doing, but never got around to was making a larger enclosure for my small saw to sit in. You may have seen these around the web, and even Norm himself made a version on The New Yankee Workshop. This type of extended table enclosure adds table surface and mass to a small saw, and it could help with dust collection also. Fancy versions may even have a better fence, adding accuracy to the setup.
Proving that there aren't many new ideas, here is today's Blast From the Past - click for larger versions of the plans.
 |
| Click to Zoom |
 |
| Click to Zoom |
Did you have a similar experience with upgrading a "starter tool"? Is there a tool you currently have that you want to improve? Let's hear about it in the comments!
Subscribe to:
Posts (Atom)


