Monday, February 28, 2011

Arrrrrrgh! Sales Counter Top Update

No, I'm not a pirate.  That's "Arrrrrrgh" as in "I am really upset and frustrated!"  Ever have one of those days?  Me too.

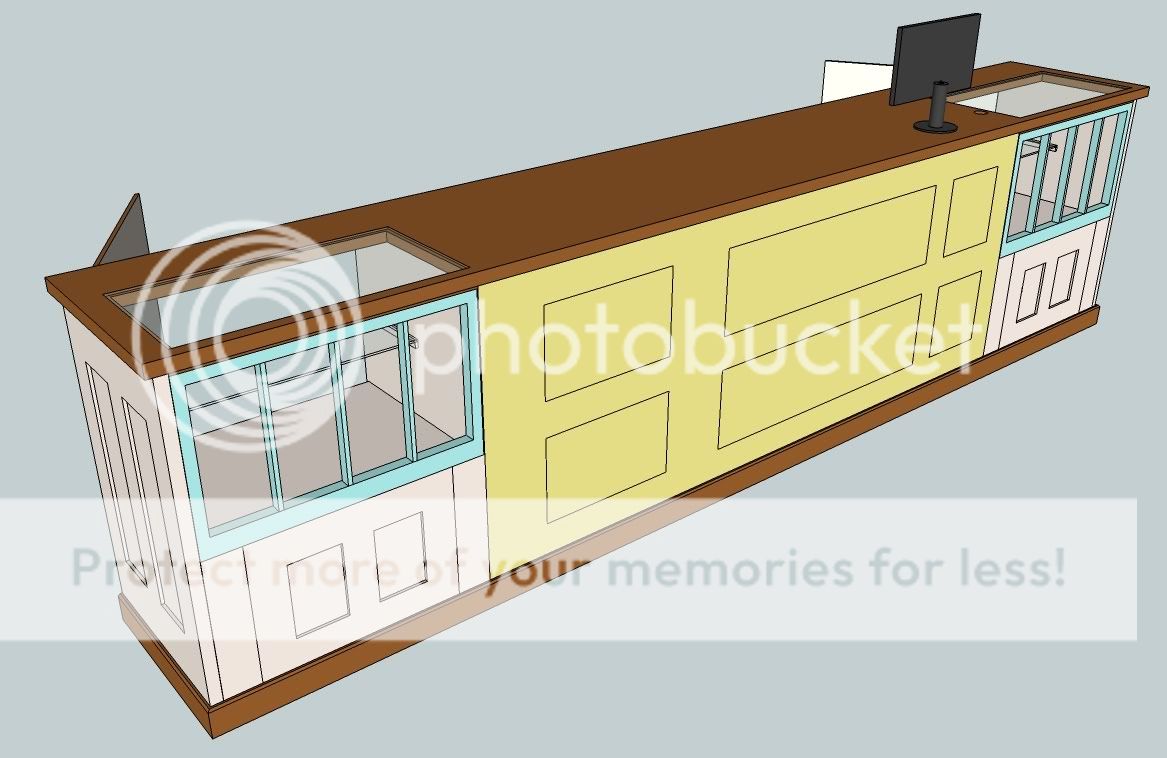
As a reminder, I recently built a sales counter for a friend that is roughly 14 feet long.  It has been installed, and the last thing left to do was join two store-bought butcher block counter tops together into a single long slab for the top.

Easy, right?  Well, kind of.  I'm going to get a lot of practice.  I made it too long the first time, so I get to try again.

Here's how I did it the first time.  With a series of too-complicated router setups, I created a half-lap joint between the two top slabs.  This turned out to be ultra-strong, but was the source of my error.  Somehow I messed up and the length of the overlap was added to the total counter.  The half-lap is about 3 inches wide.

Half lap joint is very strong, but I didn't measure correctly for overall length.
If I had caught the problem at this point, fixing it would have been easy.  I could have just trimmed the ends of the counter to the correct overall length.  Instead I just plowed ahead with all the remaining steps. I sanded, stained, varnished, and delivered the top.  I plopped it down on top of the sales counter and finally discovered the length was wrong.

"Arrrrrgh!"

This sales counter has a jewelry case at each end, so part of the design called for a glass insert in each end of the top.  You can see one of the cutouts in the picture below, and there is one on the other end too.

After adding cutouts for glass inserts, the only option is to cut it back apart to fix the length.
The problem now is that the cutouts for the glass inserts prevent me from simply trimming the ends off.  I will be forced to cut the two slabs apart again and redo the center joint.

"Arrrrrgh!"

The other challenge is that the top has been stained and I have several coats of durable poly applied as a finish.  I really don't want to repeat the half lap process, because I don't want to have to sand or plane the joint to get it flush.  I haven't had good luck touching up a stain/poly finish and I don't want to strip the entire top.

I'll keep you posted.  Back to the shop.

Ever have one of those days?  Got any ideas?  How would you recover from this blunder?  I'd love to hear it!

Tuesday, February 08, 2011

Sales Counter Installation

This past weekend I delivered and installed most of the sales counter project I have been making for a friend.  It was good to see this come together, and I have a lot more space in my shop now that it is gone.

Here is a quick video of the beginning of the installation.  I had hoped to capture it all but technology issues (ID 10 T errors probably) prevented me from getting the rest of the shot. 


You can see how the two end cabinets are the foundation for the piece, and then all the middle stuff gets added on site.  Here is the rest of the unit, all assembled and ready for the top to be installed at a later date.


All that remains is to join two large butcherblock slabs into a 14 foot long top, and to put some salvaged baseboard around the whole thing.  Stay tuned!

Ever used reclaimed materials for a project?  How did it come out?  Tell us about it in the comments!

Tuesday, February 01, 2011

Sales Counter Project

January was a busy month for me, so unfortunately I couldn't blog as much as I would like.  I have been working out in the shop though, and I am happy to share some pictures of the project that's been keeping me busy.

Our friend has a clothing boutique in the Atlanta area, and she is opening another location soon.  This friend is like my wife's crack dealer for dresses and accessories, and she always provides a personalized "Boutique Experience" when I need birthday or anniversary gift ideas.  When she asked me to build the sales counter for the new store, I happily agreed.

The design process was an easy collaboration, and of course I went to SketchUp for the final model.  Here's a shot of the whole project.


The style of the piece emphasizes reclaimed materials.  Two old window sashes became doors to the jewelry cabinets at each end, and a few salvaged doors cover the front and sides of the piece.  We raided a salvage yard together and found some lovely decrepit doors and windows for the project.  To stabilize all the old flaky paint, I sprayed the windows and the yellow door with shellac, using a simple household spray bottle.  This did a good job of getting in all the nooks and crannies and under the old paint, and the old stuff is much more firmly attached now.


I spent some time rebuilding the windows so that they will be sturdy enough for cabinet doors.  I took out all the old glass and what little putty remained.  I put in new glass with bedding caulk and some shop made 1/4" square stops.  For good measure I also pegged each corner of the window frame with two 1/4" dowels to combat sagging since the windows are about 32 inches wide.

The piece is coming together nicely, though it is a bit of a challenge in my small shop.  The counter is almost 14 feet long, and my shop is just 16x19.  Thankfully I came up with a modular design that can be assembled later.  The two end cabinets are standard plywood cases with end panels made from door slabs.  There will be an 8 foot middle section between the end cabinets, and this is just a stack of plywood dividers and shelves that get assembled later.  What makes this possible is that the middle section is just a few stretchers, shown in the picture below.


The countertop is really the biggest space challenge, since it will be a single piece almost 14 feet long.  I took the easy way out and went to Ikea for a couple 8 foot long sections of countertop, and I will join these together to make a single top slab for the sales counter.  I'm not really sure how I will do this yet, but I am thinking a ten inch long half-lap will be likely.


I am enjoying the unique aspects of this project such as incorporating old reclaimed materials into a design. Making it look old and crusty while still being functional and crisply assembled is an interesting contrast. Delivery and installation will be in the next couple weeks, and I'll try to get some pictures of the final piece. In the meantime, back to work for me!